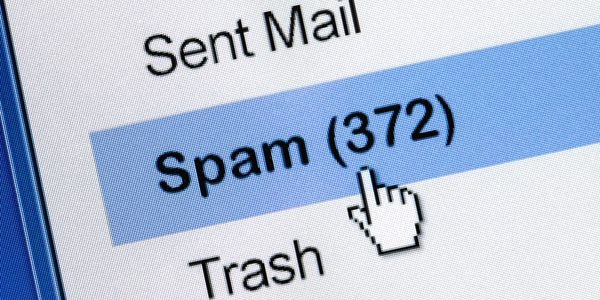
Preventing spam messages is a continuous battle. Spammers always manage to find new ways to outsmart spam filters. This blog is about that.
Why emails sometimes end up in the junk mail
Many organizations and individuals experience their emails wrongly ending up in the junk mail folder. This is frustrating and can cause important messages to be missed or go unread. There are several reasons why an email might be marked as spam, such as spam filters that automatically assess emails based on various criteria. In this blog, we explain how major systems like Microsoft Outlook SafeScreen and Gmail spam filters work, and how you can increase the chances of your emails landing in the inbox using technical measures such as SPF, DKIM, and DMARC. This helps preventing spam messages.
We’ll also discuss how to improve your sender reputation, why blacklists like Barracuda play a role, and how to correctly configure DKIM in Exchange Online. In short, with this knowledge, you can optimize your email delivery and avoid unnecessary frustration.
1. Microsoft Outlook (SafeScreen), Junk Mail Filter, and Safe Senders List help preventing spam messages
Microsoft Outlook and Office 365 use an advanced filtering system known as SafeScreen to prevent spam emails. SafeScreen uses machine learning and various algorithms to determine whether an email is potentially spam. This is done based on the so-called Spam Confidence Level (SCL) — a score that determines where an email will be delivered: to the inbox, the junk mail folder, or in some cases, blocked entirely.
The message header of an email then looks like this.
Message-ID:
 <DB4PR10MB6094F1F214C8011B2B533A22C173A@DB4PR10MB6094.EURPRD10.PROD.OUTLOOK.COM>
Accept-Language: en-US
Content-Language: en-US
X-MS-Has-Attach:
X-MS-Exchange-Organization-SCL: 1
X-MS-TNEF-Correlator:
 <DB4PR10MB6094F1F214C8011B2B533A22C173A@DB4PR10MB6094.EURPRD10.PROD.OUTLOOK.COM>
msip_labels:
MIME-Version: 1.0
You can find more information about SCL scores here. Understanding SCL scores help preventing spam message.
Users also have the option to add addresses and domains to a Safe Senders List, which helps prevent emails from being marked as spam. By adding a sender to this list, you’re indicating that emails from this sender should never be treated as spam. This helps ensure that legitimate messages don’t mistakenly end up in the junk folder.
Gmail works in a similar way, with its own spam filter that continuously learns from user feedback and behavior. Gmail also allows users to whitelist email addresses or domains, marking them as safe.
However, these filters are not perfect, and mistakes can still happen. That’s why it’s crucial to implement technical measures on the sender’s side, such as correctly configuring SPF, DKIM, and DMARC, and maintaining a strong sender reputation. Doing so significantly reduces the likelihood that your emails will end up in the spam folder. All of the above and below help preventing spam messages.
Dealing with Unwanted Email in Outlook Web
Outlook on the web (formerly Outlook Web App or OWA) provides several tools to help users manage and reduce unwanted or spam emails:
- Mark as Junk or Not Junk
When you receive a suspicious email, you can right-click it and select “Mark as junk” to move it to the Junk Email folder. Outlook learns from this action to better identify similar messages in the future. Conversely, if a legitimate message ends up in the Junk folder, you can mark it as “Not junk” to help train the filter. - Block or Allow Senders
Go to Settings > Mail > Junk email to manage your block and allow lists.- Blocked Senders and Domains: Emails from these addresses are automatically sent to Junk.
- Safe Senders and Domains: Emails from these are always delivered to your inbox.
- Create Rules
Under Settings > Mail > Rules, you can create custom rules to automatically move, delete, or flag emails based on criteria such as subject line, sender, or keywords. - Report Phishing
Suspicious emails that appear to be phishing attempts can be reported directly. In Outlook Web, you can click “Report” > “Report phishing”, which helps Microsoft improve detection and protects others. - Use Focused Inbox
Outlook’s Focused Inbox separates important emails from less relevant ones. While not a spam filter per se, it helps keep your inbox cleaner and more organized.
By actively managing these features, users can significantly reduce the impact of spam and unwanted emails in Outlook Web.
Checking the Junk Mail Folder help preventing spam messages
Checking the Junk Mail Folder
- Go to your Inbox in Outlook Web.
- Click on the Junk Email folder in the left-hand menu.
- Regularly check if legitimate messages have accidentally ended up here.
- Right-click on a message and select “Mark as not junk” to move it back to your inbox. Outlook learns from this action.
Adding Senders to the Safe Senders List
Want to prevent emails from a certain sender from going to the Junk folder?
- Open an email from the desired sender.
- Click the three dots (•••) in the top-right corner of the message window.
- Select “Add sender to safe senders”.
Alternatively:
- Go to Settings (gear icon top-right) > View all Outlook settings > Mail > Junk email.
- Manually add email addresses or domains to the Safe senders and domains list.
Blocking Senders
Tired of recurring spam from a certain address?
- Right-click on the message or open it.
- Choose “Block sender”.
- The sender will be automatically added to your blocked list, and future messages will be sent to the Junk Email folder.
Reporting Phishing help preventing spam messages
Phishing emails often pretend to be from trusted senders like banks or government agencies. Actively report them:
- Open the suspicious email.
- Click the three dots (•••) top-right.
- Select “Report security issue” > “Phishing”.
Outlook forwards this to Microsoft for analysis and helps block similar messages faster.
Reporting Spam or Unwanted Mail help prevening spam messages
Want to help improve spam filters? Outlook learns to better recognize similar messages in the future.
- Select the message.
- Click the three dots (•••).
- Choose “Report security issue” > “Junk” or “Spam”.
Settings for Junk Email in Outlook Web help preventing spam messages
Outlook Web gives users extensive control over how unwanted emails (spam, phishing, etc.) are handled. You can refine filter settings, block domains, set safe senders, and more.
Access the Settings
- Go to https://outlook.office.com and log in.
- Click the gear icon (⚙️) top-right to open Quick Settings.
- Scroll down and click “View all Outlook settings”.
- Go to Mail > Junk email.
Overview of Available Settings
- Safe senders and domains
Add email addresses or entire domains whose emails you always want to receive.
Examples:example@company.com→ only this specific address@company.com→ everyone from this domain is considered safe
Useful for trusted organizations, colleagues, customers, or newsletters that often end up in junk.
- Blocked senders and domains
Add addresses or domains you never want to hear from again.
Examples:spam@fakedomain.com→ blocks this specific address@fakedomain.com→ blocks all senders from this domain
Messages from these senders go straight to Junk Email.
Filter Settings: Standard vs. Strict help preventing spam messages
At the bottom of the Junk email settings, you’ll find an important choice:
Strict:
Outlook applies a heavier filter and sends messages from unknown or less trusted senders more quickly to Junk.
This can help if you receive a lot of spam but increases the risk of false positives (legitimate mail flagged as spam).
Standard (recommended):
Outlook uses a smart spam filter based on behavior, user reports, and content analysis.
Emails from safe senders and contacts are usually allowed.
Note: When using the strict mode, it is highly recommended to keep your safe senders list well maintained to prevent losing legitimate emails.
Always Trust Emails from Your Contacts
- Optional checkbox: “Trust messages from my contacts.”
- Ensures that emails from people in your Outlook contacts never end up in the junk folder.
Tips for Optimal Use
Use domain rules wisely: technically, you can block a domain like @gmail.com, but in practice, it’s not recommended, as you may miss many valid messages.
Use filters in combination with rules (via Settings > Mail > Rules) to, for example, automatically delete, mark, or forward messages from a specific domain.
Regularly check your Junk folder to avoid missing legitimate emails.
Now, in Practice
Online, you’ll find many posts from people who have become quite frustrated. In their view, Microsoft Support doesn’t resolve the issue either. Here are some of the problems they (and I) have encountered:
For example, with a fresh Office 365 installation, legitimate emails may end up in the spam folder. This happens because Microsoft’s SmartScreen filter needs time to learn which emails are legitimate.
To address this, I submitted a ticket to Microsoft and provided examples of emails that were incorrectly flagged as spam. Microsoft then expedited the learning process.
Before contacting them, make sure you’ve followed the steps below.
2. What is DMARC and why is it important to help preventing spam messages?
DMARC stands for Domain-based Message Authentication, Reporting & Conformance. It’s an email authentication protocol that helps prevent others from sending emails on your domain’s behalf without your permission (spoofing). This is commonly used in phishing and spam attacks. DMARC works in combination with SPF and DKIM.
A DMARC record is added to your DNS and tells receiving mail servers what to do if an incoming message fails SPF and DKIM checks. You can specify whether such emails should be rejected, quarantined, or delivered without additional action. You can also receive reports about failed and successful verifications, which provide insights into how your domain is used or abused.
Implementing DMARC improves email security and reliability. It protects your brand and recipients, and also boosts the deliverability of legitimate emails. Recipients are more likely to trust your messages when DMARC is in place.
Correctly setting up DMARC requires attention and knowledge. It depends on properly configured SPF and DKIM records and the right policy in your DMARC record. But it’s one of the most important steps in preventing your emails from ending up in spam or being used maliciously.
So much for the theory. How does this work in practice?
Basic Principles of a DMARC Record
- Type: TXT
- Name (host):
_dmarc.yourdomain.com - Value (content): contains the DMARC policy
Example 1: Monitor only (none)
v=DMARC1; p=none; rua=mailto:dmarc@yourdomain.com🔹 Explanation:
v=DMARC1: Mandatory declaration that it’s a DMARC record.p=none: Take no action, just collect reports.rua=mailto:dmarc@yourdomain.com: Send reports to this email address.
Use: Ideal as a first step to monitor without impacting mail flow.
Example 2: Quarantine (e.g., spam folder)
v=DMARC1; p=quarantine; rua=mailto:dmarc@yourdomain.com; pct=100🔹 Explanation:
p=quarantine: Mark suspicious emails.pct=100: Apply policy to 100% of the emails.
Use: When you have decent SPF and DKIM setup but want to monitor more strictly.
Example 3: Reject (strictest setting)
v=DMARC1; p=reject; rua=mailto:dmarc@yourdomain.com; ruf=mailto:forensic@yourdomain.com; adkim=s; aspf=s🔹 Explanation:
p=reject: Block emails failing SPF/DKIM.ruf=mailto:forensic@yourdomain.com: (Optional) Send forensic reports (may have privacy implications).adkim=sandaspf=s: Require exact domain matches.
Use: For domains where you have full control over all mail flow.
Example 4: Gradual enforcement (50% reject)
v=DMARC1; p=reject; pct=50; rua=mailto:dmarc@yourdomain.com🔹 Explanation:
pct=50: Only apply the reject policy to 50% of emails.
Use: Helpful for transitioning from “none” to “reject.”
Important Tips
Use valid email addresses for rua and ruf where you can receive and analyze reports.
Use a DMARC analysis tool like DMARCian or Postmark to interpret reports.
Add the DMARC record in your DNS provider as a TXT record on the subdomain _dmarc.yourdomain.com.
3. What is DKIM and how does it help preventing spam messages?
DKIM, or DomainKeys Identified Mail, adds a digital signature to outgoing emails. This signature proves that the email comes from the domain owner and that the content has not been tampered with in transit. It uses a private key on the sending server and a public key in the domain’s DNS.
When a recipient mail server gets an email, it retrieves the public key from DNS to verify the signature. If it matches, the email is considered authentic and unaltered, increasing trust and reducing spam classification.
DKIM is a major email security standard and is widely supported. Alongside SPF and DMARC, it forms a strong foundation for email authenticity.
Proper DKIM setup improves your sender reputation and helps keep legitimate messages out of the spam folder. It’s a technical configuration typically supported by your mail provider or service.
So much for the theory. How does this work in practice to help preventing spam messages?
Setting Up DKIM in DNS
- Type: TXT
- Name (host):
selector._domainkey.yourdomain.com(e.g.selector1._domainkey.yourdomain.com) - Value: The public key, e.g.:
v=DKIM1; k=rsa; p=MIGfMA0GCSqGSIb3DQE...(truncated)
Example 1: Microsoft 365 (Exchange Online)
Microsoft creates two selectors (usually selector1 and selector2):
Hostnames:
selector1._domainkey.yourdomain.comselector2._domainkey.yourdomain.com
Value (example):
v=DKIM1; k=rsa; p=MIGfMA0GCSqGSIb3DQEBAQUAA4GNADCBiQKBgQDp...🔹 Manage DKIM in Microsoft 365 via the Defender Portal or PowerShell. You can add the public keys in DNS via your provider (for example TransIP, Cloudflare, etc.).
Example 2: Google Workspace
Google uses the selector google:
Host:google._domainkey.yourdomain.com
Value (for example):
v=DKIM1; k=rsa; p=MIIBIjANBgkqhkiG9...🔹 Manage DKIM via:
Apps > Google Workspace > Gmail > Authenticate email
Example 3: Mailchimp
Mailchimp often uses selector k1.
Host:k1._domainkey.yourdomain.com
Value:
v=DKIM1; k=rsa; p=MIGfMA0GCSqG...🔹 Set this up under: Website > Domains > Authenticate. You can get the exact value which you can add to your DNS.
Key Considerations
- DKIM keys may expire or rotate — sometimes automatically (Microsoft), sometimes manually.
- Copy the DKIM record exactly as provided by your mail provider.
- Ensure the correct selector name. It must be in the form:
selector._domainkey.yourdomain.com - Long keys: some DNS providers require splitting into multiple strings.
Verification Tools
Or use tools like:
dkimcore.org
MXToolbox DKIM Check
Send a test mail to: check-auth@verifier.port25.com
4. What is SPF and why is it necessary?
SPF, or Sender Policy Framework, specifies which mail servers are allowed to send mail on behalf of your domain. You add a TXT record to your DNS with authorized IPs or services.
When a recipient mail server receives an email, it checks the domain’s SPF record to see if the sending IP is authorized. If not, the mail may be marked as spam or rejected.
SPF helps prevent spoofing and enhances trust. It’s a crucial step in securing email delivery.
So much for the theory. How does this work in practice?
Basic SPF Record Setup
- Type: TXT
- Name (host):
@or your root domain - Value: Always starts with
v=spf1
Example 1: Own mail server (IP address)
v=spf1 ip4:192.0.2.10 -allExplanation:
- Only this IP can send mail. Everything else is rejected.
-all: All other sources are explicitly not allowed (hard fail).
Example 2: Microsoft 365 / Exchange Online
v=spf1 include:spf.protection.outlook.com -allExplanation:
include:spf.protection.outlook.com: This allows Microsoft 365 servers to send mail on behalf of your domain.-all: Reject all mail that does not come from Microsoft 365.
Example 3: Multiple services (Google + Mailchimp)
v=spf1 ip4:198.51.100.25 include:_spf.sendgrid.net -allExplanation:
include:_spf.google.com: This allows Google Workspace (Gmail for business) to send mail on behalf of your domain.include:servers.mcsv.net: This allows Mailchimp to send mail on behalf of your domain.-all: Reject all mail that does not come from one of the services listed above.
Example 4: Gradual enforcement (50% reject)
v=DMARC1; p=reject; pct=50; rua=mailto:dmarc@yourdomain.comExplanation:
ip4:198.51.100.25: Your own mail server.include:_spf.sendgrid.net: SendGrid as your email provider.-all: Only these two sources are allowed to send email on behalf of your domain. All others are rejected.
Example 5: Soft fail (testing)
v=spf1 include:_spf.google.com ~allExplanation:
- “~all” allows monitoring without hard rejection.
- Useful during testing phases or when you’re not yet sure which services are sending emails on behalf of your domain.
Common Mistakes
Too many include: directives — limit is 10 DNS lookups
Not ending with -all, ~all, or ?all
Adding multiple SPF records (only one allowed!)
5. Sender reputation: What is it and how do you build it?
Sender reputation is a score given by mail providers to your IP or domain based on email behavior. Good reputation increases inbox delivery. Poor reputation leads to spam or rejection.
Factors affecting it:
- Spam complaints
- Bounces
- List quality
- Consistent sending practices
To build a strong reputation:
- Use opt-in only
- Clean inactive addresses
- Set up SPF, DKIM, DMARC
- Offer clear unsubscribe options
- Avoid spammy content
- Slowly ramp up sending volume (warming up)
Monitor your reputation using tools from Microsoft, Google, etc.
6. Blacklists and what to do if you’re listed
Blacklists are lists of IPs/domains known for spam. Email systems (e.g., Barracuda) use them to block spam. If listed, your emails may be blocked or land in spam.
Causes:
- Sending spam
- Hacked mailserver
- Mass mailings without permission
What to do:
- Identify and fix the cause (e.g., malware, relay abuse).
- Secure your mail server.
- Submit delisting requests to blacklist maintainers.
Check if you’re blacklisted:
Technical checklist:
- Reverse DNS (PTR)
- SPF, DKIM, DMARC set up
- No open relay
- Clean mail queues and logs
Delisting contacts:
| Blacklist | URL | Notes |
|---|---|---|
| Spamhaus (ZEN) | https://www.spamhaus.org/lookup/ | Very strict; cause must be resolved |
| SORBS | http://www.sorbs.net/lookup.shtml | Requires registration and explanation |
| Spamcop | https://www.spamcop.net/bl.shtml | Auto-delists in 24 hours if no new spam |
| UCEPROTECT | https://www.uceprotect.net/ | May block entire ASNs, harder to delist |
So much for the theory. How does this work in practice?
If you run your own mail server and your IP address ends up on a blacklist (DNSBL/RBL), it can seriously hinder your mail delivery: recipients may receive your emails in their spam folder or not at all. Fortunately, you can often take action to have your IP removed from the blacklist.
Below, I’ll explain step by step what you can do.
Check if your IP is actually on a blacklist
Use a tool such as:
🔍 MXToolbox Blacklist Check
🔍 UltraTools Blacklist Check
Enter the IP address of your mail server (not your domain!) and see which lists you’re on.
Resolve the underlying issue to prevent spam emails
Before you submit removal requests, it’s crucial to ensure your mail server is properly configured. Check, among other things:
Reverse DNS (PTR record)
- Your IP should have a reverse DNS, such as
mail.yourdomain.com - Test:
nslookup <ip-address>
- SPF, DKIM, and DMARC correctly configured
- Make sure these email authentication records are present in your DNS.
- Check with tools such as:
No open relay
- Ensure your mail server doesn’t forward third-party emails without restriction.
- Test: https://www.mailradar.com/openrelay/
Server is not being abused for spam
- Scan for malware, bots, or misconfigurations.
- Check the mail queue: are large volumes being sent from unauthorized accounts?
Step 3: Submit a delisting request
Depending on the blacklist, you’ll need to contact them to request removal of your IP address.
| Blacklist | Delisting Page | Notes |
|---|---|---|
| Spamhaus (ZEN) | https://www.spamhaus.org/lookup/ | Very strict; root cause must be resolved. |
| SORBS | http://www.sorbs.net/lookup.shtml | Requires registration and explanation. |
| Spamcop | https://www.spamcop.net/bl.shtml | Automatic delisting after 24 hours if no new spam traffic is detected. |
| UCEPROTECT | https://www.uceprotect.net/ | May blacklist at ASN level; removal can be difficult. |
| Barracuda | https://www.barracudacentral.org/rbl/removal-request |
Note: You’ll often need to provide an email address associated with the domain/IP and explain what you’ve fixed.
Preventing Future Blacklisting
- Regularly monitor your IP with monitoring tools or alerts (such as MXToolbox).
- Configure rate limiting and throttling on your mail server, especially for large mailing lists.
- Set up spam filters and content checks — don’t send suspicious or spam-like content.
- Use a dedicated IP address exclusively for your legitimate email traffic.
- Clean up your mailing lists — stop mailing inactive or unwanted addresses.
Alternative: Use an External Email Provider
If you’re constantly facing blacklisting or reputation issues, consider using an SMTP relay service such as:
- Amazon SES
- SendGrid
- Mailgun
- Microsoft 365 / Google Workspace
These services handle IP reputation management and help prevent your own IP from being blacklisted.
7. Exchange Online and DKIM signatures: How to add Them?
Exchange Online, part of Microsoft 365, offers a built-in feature to add DKIM signatures to outgoing emails. This helps authenticate your emails and improve delivery. It also helps prevent spam emails.
To activate DKIM in Exchange Online, you first need to add two CNAME records to your DNS. These point to Microsoft’s DKIM servers and ensure the signatures can be verified.
The steps are as follows:
- Log in to the Microsoft 365 Defender portal.
- Go to Email & Collaboration and select DKIM.
- Select the domain for which you want to enable DKIM.
- Create two CNAME records in your DNS according to Microsoft’s instructions. These records usually look like:
selector1._domainkey.yourdomain.comandselector2._domainkey.yourdomain.com. - After the DNS records are added and propagated, activate DKIM in the Defender portal.
Finally, once this is done, Exchange Online will automatically digitally sign all outgoing emails from that domain with DKIM. This increases reliability and helps prevent your emails from being marked as spam.
8. List-Unsubscribe Header: What is it and how to configure it to help preventing spam messages?
The List-Unsubscribe header is a special email header that you add to your outgoing marketing or newsletter emails. This header makes it very easy for recipients to unsubscribe from a mailing list without having to search for an unsubscribe link within the email itself. Major email providers like Gmail, Outlook, and Yahoo use this header to display an unsubscribe button right next to the message. This improves the user experience and also helps reduce spam complaints.
By adding the List-Unsubscribe header, you give recipients a clear and quick way to opt out, which contributes to a better sender reputation and prevents people from marking your messages as spam. It’s a win-win situation: recipients have control, and you keep your mailing list clean and healthy. All of the above and below help preventing spam messages.
Different Formats
The header can take different forms, such as a mailto address where an unsubscribe email is sent, or a URL where someone can unsubscribe via a web form. Often, you’ll see a combination of both.
Within Exchange Online, you can add the List-Unsubscribe header using a transport rule (mail flow rule). Here’s how:
- Go to the Microsoft 365 Defender portal and open the Exchange admin console.
- Navigate to Mail flow > Rules.
- Create a new rule, for example named “Add List-Unsubscribe Header.”
- Choose the action Apply a message header.
- Enter the header name:
List-Unsubscribe. - Enter the value, for example:
<mailto:unsubscribe@yourdomain.com>, <https://yourdomain.com/unsubscribe>. - Save and activate the rule.
From that moment on, the List-Unsubscribe header will automatically be added to all outgoing emails that match the rule.
Finally, implementing this header is a relatively simple but very effective way to give recipients control and improve the delivery of your emails. This also helps preventing spam messages.
You can contact me via this contact form.