Yet another new blog about Business Central on Docker. The fact is, I don’t install this on Docker every day, so I always have to look up the latest information. For example, to this day I haven’t managed to use PowerShell 7 with BcContainerHelper. To make matters worse, I thought I could run this on a Windows Server 2025 in Azure. By now, I’ve gone back to using PowerShell 5.1 via PowerShell ISE on Windows Server 2022. So just a small detour, with big consequences, because I’ve lost a lot of time trying to solve things that don’t seem to work yet. For the purpose of this blog post—getting Business Central 2025 Wave 1 (version 26) running on Docker—that doesn’t matter for now.
First template I used.
# Begin variables
$containerName = $containerName
$dnsName = $dnsName # For example "docker.example.com"
$password = $password
$userName = $userName
$authenticationEmail = $authenticationEmail
$securePassword = ConvertTo-SecureString -String $password -AsPlainText -Force
$credential = New-Object pscredential $userName, $securePassword
$auth = 'UserPassword'
$artifactUrl = Get-BcArtifactUrl -type 'Sandbox' -country 'nl' -select 'Latest'
$aadTenant = $aadTenant
$aadAppId = $aadAppId
$aadAppIdUri = $aadAppIdUri
$licenseFile = $licenseFile
# End variables

# Begin installatie module BcContainerHelper
Install-Module BcContainerHelper -force
# End installatie module BcContainerHelper

# Begin deployment
New-BcContainer `
  -accept_eula `
  -containerName $containerName `
  -artifactUrl $artifactUrl `
  -auth "AAD" `
  -aadTenantId $aadTenant `
  -AuthenticationEMail $aadUser `
  -Credential $MyCredential `
  -useSSL=Y `
  -publicDnsName $dnsName `
  -assignPremiumPlan `
  -updateHosts `
  -dns "8.8.8.8" `
  -includeTestToolkit `
  -includeTestLibrariesOnly `
  -AadAppId  $aadAppId `
  -AadAppIdUri $aadAppIdUri `
  -installCertificateOnHost=Y `
  -multitenant `
  -WebClientPort 443 `
  -licenseFile $licenseFile `
  -alwaysPull
# End deployment
Note: The variables still need to be filled in. Due to privacy reasons, I’ve given them the same name.
Of course, I could just go for the easy route. We install Docker, switch it to Windows Containers, and make sure that Hyper-V and Containers are enabled as roles on Windows Server 2022. What I want is to run this with Azure AD Authentication. Most of the blogs available online don’t describe how to do that. The easiest approach is, of course, to configure the Server Instance with NavUserPassword as the authentication mechanism.
The second template I’m using is the following one. By the way, I used a blog post you can find on this site. Much more convenient, of course. Otherwise, I would have to manually enter the AAD credentials each time. Other than that: spot the differences!
# Begin prerequisites
Set-ExecutionPolicy Unrestricted -Scope LocalMachine -Force
Install-PackageProvider -Name NuGet -force
Install-Module BcContainerHelper -Force
# End prerequisites

# Begin variables
$containerName = $containterName
$aadTenant = $aadTenant
$aadUser = $aadUser
$dnsName = $dnsName
$artifactUrl = Get-BcArtifactUrl -type 'Sandbox' -country 'nl' -select 'Latest'
$aadAppId = $aadAppId
$aadAppIdUri = $aadAppIdUri
$licenseFile = "C:\temp\4845780.bclicense"
$UserName = Read-Host "Enter Username"
$Password = Read-Host "Enter Password" -AsSecureString
$TEMP = "$env:TEMP"
$File = "$Temp\Password.txt"
$Password | ConvertTo-SecureString -AsPlainText -Force | ConvertFrom-SecureString | Out-File $File
$Password = Get-Content $File | ConvertTo-SecureString
$User = $UserName
$MyCredential=New-Object -TypeName System.Management.Automation.PSCredential `
 -ArgumentList $User, (Get-Content $File | ConvertTo-SecureString)
# End variables

# Begin deployment
New-BcContainer `
  -accept_eula `
  -containerName $containerName `
  -artifactUrl $artifactUrl `
  -auth "AAD" `
  -aadTenantId $aadTenant `
  -AuthenticationEMail $aadUser `
  -Credential $MyCredential `
  -useSSL=Y `
  -publicDnsName $dnsName `
  -assignPremiumPlan `
  -updateHosts `
  -dns "8.8.8.8" `
  -AadAppId  $aadAppId `
  -AadAppIdUri $aadAppIdUri `
  -useSSL=Y `
  -installCertificateOnHost=Y `
  -multitenant `
  -WebClientPort 443 `
  -licenseFile $licenseFile `
  -additionalParameters @("--publish 443:443")
# End deployment

# Begin import modules
Enter-BcContainer -containerName $containerName
Import-Module WebAdministration
Import-Module "C:\Program Files\Microsoft Dynamics NAV\260\Service\Microsoft.Dynamics.Nav.Management.psm1"
Import-Module "C:\Program Files\Microsoft Dynamics NAV\260\Service\NAVWebClientManagement.psm1"
# End import modules

# Begin list certificates in LocalMachine\My
$cert = Get-ChildItem -Path Cert:\LocalMachine\My |
    Where-Object { $_.Subject -like "*$dnsName*" } |
    Sort-Object NotAfter -Descending |
    Select-Object -First 1
$ServicesCertificateThumbprint = $cert.Thumbprint
# Begin list certificates in LocalMachine\My

# Begin configuring the parameters
Set-NAVServerConfiguration -ServerInstance BC -KeyName PublicWebBaseUrl -KeyValue "https://$dnsName/BC/"
Set-NAVServerConfiguration -ServerInstance BC -KeyName PublicSOAPBaseUrl -KeyValue "https://$dnsName:7047/BC/WS/"
Set-NAVServerConfiguration -ServerInstance BC -KeyName PublicODataBaseUrl -KeyValue "https://$dnsName:7048/BC/ODataV4/"
Set-NAVServerConfiguration -ServerInstance BC -KeyName PublicWinBaseUrl -KeyValue ""
Set-NAVServerConfiguration -ServerInstance BC -KeyName ServicesCertificateThumbprint -KeyValue $ServicesCertificateThumbprint
Restart-NAVServerInstance -ServerInstance BC -Force
Get-NAVServerConfiguration -ServerInstance BC
# End configuring the parameters

# Begin troubleshooting
Get-WebSite
Get-WebBinding
Remove-WebBinding -Name http -BindingInformation "*:443:"
Stop-Website -Name http
Start-Website -Name http
New-WebBinding -Name "NavWebApplicationContainer" -Protocol https -Port 443 -HostHeader "$dnsName"
Start-Website -Name "NavWebApplicationContainer"
netsh http add sslcert ipport=0.0.0.0:443 certhash=$ServicesCertificateThumbprint appid='{00112233-4455-6677-8899-AABBCCDDEEFF}'
# End troubleshooting

# Begin export / import SSL cert
$cert = Get-ChildItem -Path Cert:\LocalMachine\My | Where-Object { $_.Subject -like "*$dnsName*" }
$certPath = "C:\run\$dnsName.cer"
Export-Certificate -Cert $cert -FilePath $certPath
exit
docker cp bc-aad-nl:"C:\run\$dnsName.cer" "C:\temp\$dnsName.cer"
Import-Certificate -FilePath "C:\temp\$dnsName.nl.cer" -CertStoreLocation "Cert:\LocalMachine\Root"
# End export / import SSL cert
The deployment was done using this script, and the connections are ready to go. Nice.
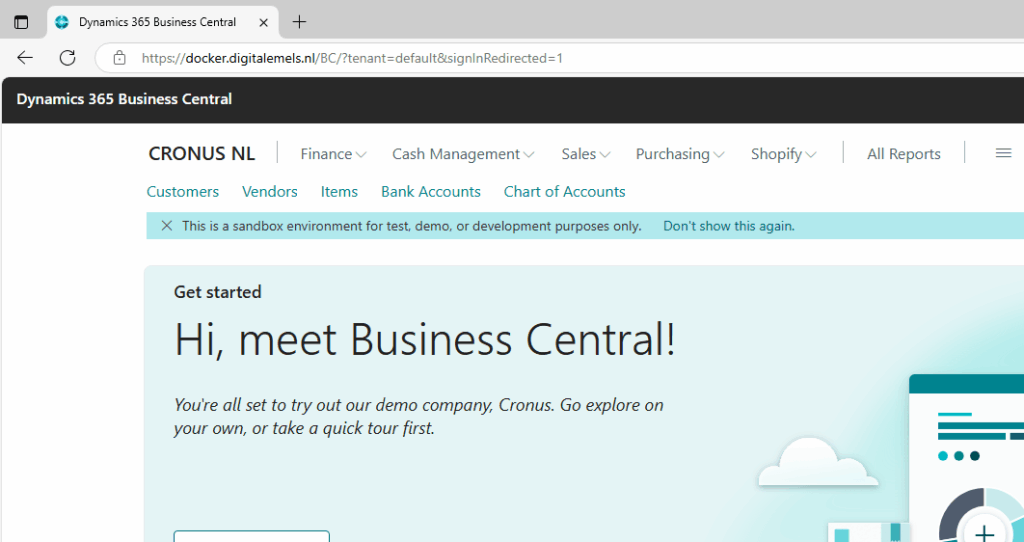
Why doesn’t Business Central work out of the box on Docker?
This happens because New-BcContainer sets up a separate site for internal purposes on port 8080, specifically at http://$dnsName:8080/language.vsix. However, since we’re using the useSSL and installCertificateOnHost parameters, New-BcContainer adds a binding on port 443 to every IIS site. But because we can’t have multiple identical wildcard bindings on two sites within IIS, a problem arises where the site NavWebApplicationContainer fails to start.
The solution is to remove the HTTP binding from the IIS site and add a new binding via netsh. We do that using the script above.
But there is an easier way.
Another option is to provide a script along with a certificate
We use an SSL certificate for this, which we place in a folder on the host. This can be either a self-signed certificate or a trusted one. If we want to use a self-signed SSL certificate, that’s possible by following the blog post available on this site. The PowerShell script would then look like this.
# Begin prerequisites
Set-ExecutionPolicy Unrestricted -Scope LocalMachine -Force
Install-PackageProvider -Name NuGet -force
Install-Module BcContainerHelper -Force
# End prerequisites

# Begin variables
$containerName = $containerName
$aadTenant = $aadTenant
$dnsName = $dnsName
$artifactUrl = Get-BcArtifactUrl -type 'Sandbox' -country 'nl' -select 'Latest'
$aadAppId = $aadAppId
$aadAppIdUri = $aadAppIdUri
$licenseFile = $licenseFile
$UserName = Read-Host "Enter Username"
$Password = Read-Host "Enter Password" -AsSecureString
$TEMP = "$env:TEMP"
$File = "$Temp\Password.txt"
$Password | ConvertTo-SecureString -AsPlainText -Force | ConvertFrom-SecureString | Out-File $File
$Password = Get-Content $File | ConvertTo-SecureString
$MyCredential=New-Object -TypeName System.Management.Automation.PSCredential `
 -ArgumentList $UserName, (Get-Content $File | ConvertTo-SecureString)
# End variables

# Begin deployment
New-BCContainer -accept_eula `
                -isolation process `
                -containerName $containerName `
                -memoryLimit 8G `
                -artifactUrl $artifactUrl `
                -Credential $MyCredential `
                -updateHosts `
                -doNotExportObjectsToText `
                -auth AAD `
                -aadTenantId $aadTenant `
                -AadAppId  $aadAppId `
                -AadAppIdUri $aadAppIdUri `
                -AuthenticationEMail $userName `
                 -multitenant `
                -dns "8.8.8.8" `
                -additionalParameters $additionalParameters `
                -useSSL `
                -shortcuts Desktop `
                -assignPremiumPlan `
                -licenseFile $licenseFile `
                -myScripts @{"SetupCertificate.ps1" = $SetupCertificateScript}, "C:\temp\SSL Cert.p12"
# End deployment

# Begin enabling rewrite rules in web.config
Copy-FileFromBcContainer -containerName $containerName `
  -containerPath 'C:\inetpub\wwwroot\bc\web.config' `
  -localPath 'C:\Temp\web.config'

Copy-FileToBcContainer -containerName $containerName `
 -containerPath 'C:\inetpub\wwwroot\bc\web.config' `
 -localPath 'C:\Temp\web.config'
# Begin enabling rewrite rules in web.config

# Begin import modules
Enter-BcContainer -containerName $containerName
Import-Module "C:\Program Files\Microsoft Dynamics NAV\260\Service\Microsoft.Dynamics.Nav.Management.psm1"
Import-Module "C:\Program Files\Microsoft Dynamics NAV\260\Service\NAVWebClientManagement.psm1"
# End import modules

# Begin adjusting tenant properties
Dismount-NAVTenant -Tenant default -ServerInstance BC -Force
Mount-NavTenant -ServerInstance BC -Tenant default -DatabaseName default -DatabaseServer localhost\SQLEXPRESS `
-AadTenantId $dnsName -AlternateId $dnsName -NasServicesEnabled -OverwriteTenantIdInDatabase
# End adjusting tenant properties
For more information on how to enable the rewrite rule in the web.config file to allow host names for tenants, read here.